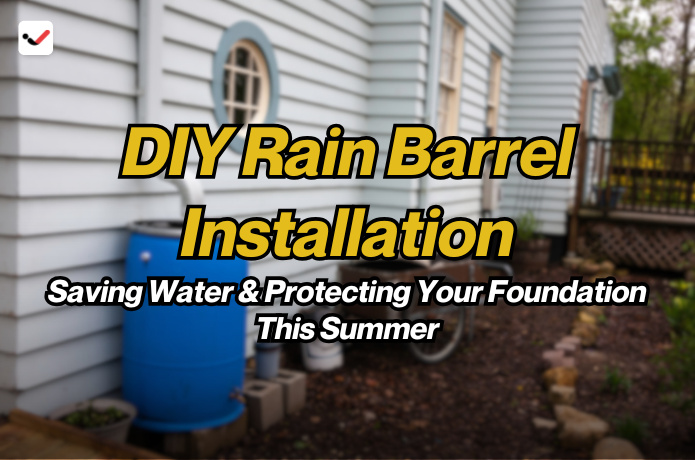
DIY Rain Barrel Installation: Saving Water & Protecting Your Foundation This Summer
DIY Rain Barrel Installation: Saving Water & Protecting Your Foundation This Summer
Summer brings sunshine, longer days, and lots of outdoor activities—but it also brings higher water bills, garden maintenance, and sometimes heavy rainfall. For homeowners looking to save water at home and protect their property, installing a rain barrel is a smart and simple solution. Whether you're trying to cut costs or take a step toward greener living, a DIY rain barrel helps you make the most of every summer rain.
By collecting rainwater that runs off your roof, you can reduce your water usage, lower utility costs, and have a steady supply of water for your garden. But there’s more—rainwater harvesting for beginners isn’t just about saving water. A rain barrel can also help protect your home’s foundation from rainwater damage by keeping runoff away from the base of your house. This article will walk you through the benefits, tools, setup process, and maintenance tips to help you start your DIY water conservation journey today.
Why Rain Barrels Are a Great Summer Project
1. Conserve Water Easily
During the summer, outdoor watering can account for over half of your household water use. Rain barrels collect and store free water from your gutters, allowing you to save water at home during dry spells. A single 50-gallon barrel can collect enough water to fill several watering cans, helping you cut back on treated tap water use.
2. Lower Your Water Bill
Rainwater is free. Once your rain barrel is set up, every rainfall brings savings. Over the course of a season, you could save hundreds of gallons of water—and money. If you’re watering your lawn, flowers, or vegetables regularly, using collected rainwater instead of a hose can lead to noticeable savings on your bill.
3. Help Your Plants Thrive
Rainwater is soft and naturally free from chlorine, fluoride, and other chemicals often found in tap water. Your plants will respond better to rainwater, especially if they’re sensitive to treated water. Using rainwater helps keep your soil healthy and reduces salt buildup that can harm plant roots.
4. Prevent Foundation Damage
Water pooling around your home can lead to erosion, basement leaks, and even structural issues. A rain barrel helps protect your foundation from rainwater by collecting and redirecting roof runoff. By controlling the flow, you reduce the chances of water soaking into the ground around your home’s base.
5. Reduce Stormwater Runoff
When it rains, water rushes off roofs and driveways, often picking up debris, oil, and fertilizers that end up in local streams. Capturing rainwater reduces this runoff and helps prevent pollution in nearby waterways. It’s a small step, but it makes a big difference in protecting the environment.
What You’ll Need for DIY Rain Barrel Installation
Getting started is easy and affordable. Here’s a list of basic tools and materials needed for a DIY rain barrel setup:
Materials:
Rain Barrel (50-80 gallons, plastic or repurposed food-grade container)
Spigot Kit (faucet, washers, nuts)
Overflow Valve or Hose
Downspout Diverter Kit or Downspout Elbow
Cinder Blocks or Paver Stones (for stable base)
Mesh Screen or Lid (to block debris and mosquitoes)
Tools:
Power Drill and Drill Bits
Saw or Tin Snips (to cut downspout)
Wrench or Pliers
Level (to ensure base is even)
Caulk or Silicone Sealant
Optional: Teflon tape for sealing spigot threads, mosquito dunk (safe for gardens), decorative paint or wooden screen to blend the barrel into your yard.
How to Install a Rain Barrel: Step-by-Step Guide
Step 1: Pick the Right Location
Choose a spot under a downspout near your garden, lawn, or flower beds. Make sure the ground is level and solid. Rain barrels work best when slightly elevated, so water flows out by gravity.
Use concrete blocks or paver stones to create a stable, flat surface. This will raise the barrel for easier access to the spigot and better water pressure when using hoses or watering cans.
Step 2: Prepare Your Barrel
If your rain barrel came ready-made, it likely has a spigot and overflow outlet already installed. If not:
Drill a hole a few inches from the bottom for the spigot.
Install the spigot using the provided washers and nuts.
Near the top of the barrel, drill another hole for the overflow valve or hose.
Cover the top with a mesh screen or lid to keep out leaves, bugs, and animals.
Make sure the spigot is tight and easily reachable once the barrel is in place.
Step 3: Cut the Downspout
To direct rainwater into the barrel, you need to adjust your gutter’s downspout. There are two easy ways:
Option 1: Diverter Kit
This kit allows you to collect water and automatically redirect overflow back into the downspout once the barrel is full.
Measure and mark where to install the diverter (usually level with the top of the barrel).
Cut the downspout with a saw or tin snips.
Install the diverter and connect it to the barrel with the included hose.
Option 2: Elbow or Extension
For a simple setup, cut the downspout to end just above the barrel and attach an elbow or extension so water flows directly onto the mesh screen.
Either method works—choose what suits your tools and skill level.
Step 4: Secure the Barrel
Place the barrel on your prepared base. Double-check that the:
Spigot is facing outward
Lid or screen is tightly secured
Overflow hose is pointed away from the foundation (at least 6 feet)
Test the system by spraying your roof with a hose. Make sure the water flows into the barrel and that the spigot works properly.
Maintenance Tips for Your Rain Barrel
To keep your DIY water conservation system running smoothly all summer (and beyond), follow these tips:
1. Use Water Often
Don’t let water sit for too long. Use it regularly to avoid stagnation and reduce the chance of mosquito breeding. During dry spells, try to empty the barrel before the next rainfall to make room.
2. Clean Gutters and Screens
Leaves and roof debris can clog your gutters and screen. Clean them regularly so water flows easily and stays clean.
3. Watch for Algae or Sediment
Over time, dirt can collect at the bottom of your barrel. Drain and clean it with mild soap or vinegar a few times a year. If algae becomes a problem, keep the barrel shaded or painted to block sunlight.
4. Winterize If Needed
If you live in a cold climate, empty and disconnect your barrel before freezing temperatures hit. Store it upside down or indoors to prevent cracks from expanding ice.
Extra Tips to Make Your Rain Barrel Even Better
Link Multiple Barrels
Want more water storage? Connect two or more barrels with a hose from the overflow valve of one into the next. This way, when one fills up, the excess goes into the next one automatically.
Add a Soaker Hose
Connect a soaker hose to the spigot to water your garden slowly and evenly. Just make sure the hose lies lower than the barrel to keep the water flowing by gravity.
Make It Look Nice
Paint your rain barrel to match your house or garden. Or, surround it with lattice or potted plants to blend it into your outdoor space.
Secure the Barrel
Once full, your barrel will weigh over 400 pounds. Always place it on a strong, level base. Keep the lid tight to prevent accidents, especially around children or pets
A Smart Summer Project with Lasting Benefits
A DIY rain barrel installation is a low-cost, high-impact project that helps you save water at home, lower bills, and protect your property. It’s perfect for beginners, eco-conscious families, and anyone who wants to get more out of their home during the summer.
With just a few tools and a weekend afternoon, you’ll set up a system that collects free water, supports a healthy garden, and reduces the risk of foundation problems. Plus, it's a project that pays off rain after rain.
So grab your tools, choose a downspout, and start harvesting. Your garden—and your wallet—will thank you.